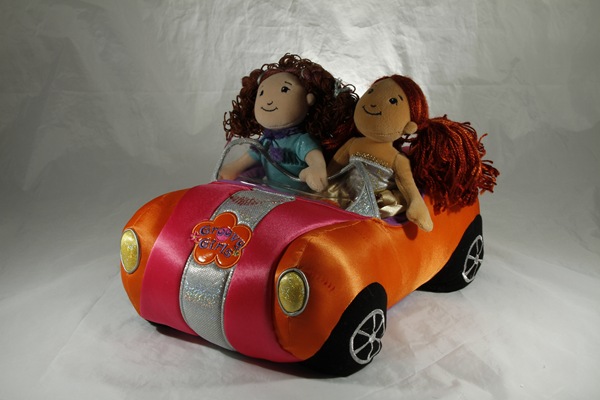
Among the features listed on our recent review of the new powerhouse Canon EOS 7D is wireless flash control. Sought after by many photographers, this version 1.0 feature has some useful capabilities thanks to the addition of a popup flash to Canons X D line. Controlling flash ratios, as well as exposure, from the camera can make shoots with multiple flashes far easier. Flashes can further be controlled as individual groups or treated as one large flash.
The system works by using the camera’s pop-up flash as the master, while other Canon EX-Series flashes are set as slaves. In the demonstration below, all remote flashes are set to channel 1 (three channels are possible to prevent misfiring when working around other photographers) and then each flash is assigned group A, B or C. For this simple demonstration, A will be to the left of the model (in this case, the fabulous Groovy Girls car borrowed from my daughter), B will be to the right and C will be behind the car, lighting the background. Let’s take a look at how the controls work.
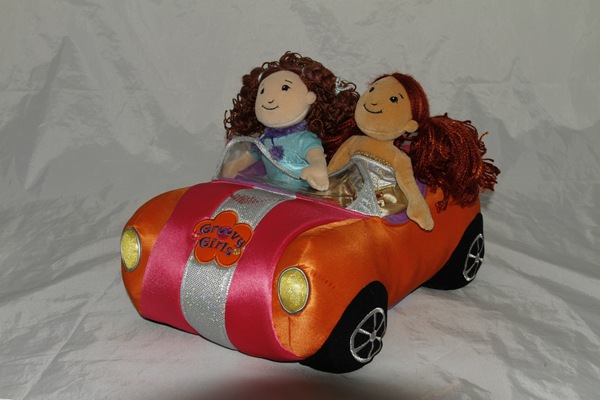
First, pop up the built in flash by pressing the button located on the front of the camera housing. Here’s the first shot of the Groovy Girls enjoying a ride in their Groovy Car, lit by only the pop-up flash (All images Canon7D, Canon 28-300mm L lens, 1/200sec, f/16, ISO 100). Click on images for a larger version.
Next, press the Menu button and then navigate to the first grouping, scrolling down until you reach “Flash Control”. Press the Set button (center of the rear control wheel)
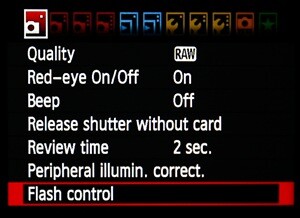
On the next screen, select Built-in flash func. setting
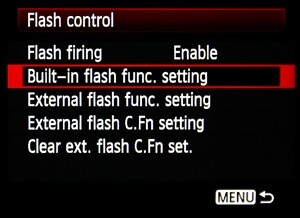
Now, scroll down to Wireless func. and enable it if it is not already. Select just the center option (while not covered in this article, the other modes allow for inclusion of the pop-up flash’s light either as a ratio or as part of the overall metering)
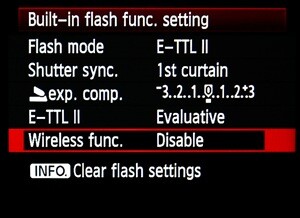
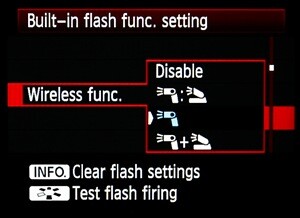
The menu will return to the previous screen, where additional options will be unlocked. Only functions that may be used with your current setting will be selectable from this point on. Select firing group and Choose the (A:B) option. This selection allows the flashes in group A to be set as a ration to group B, or the other way around.
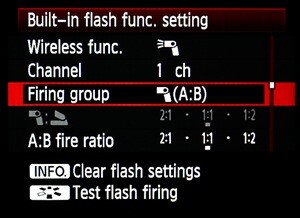
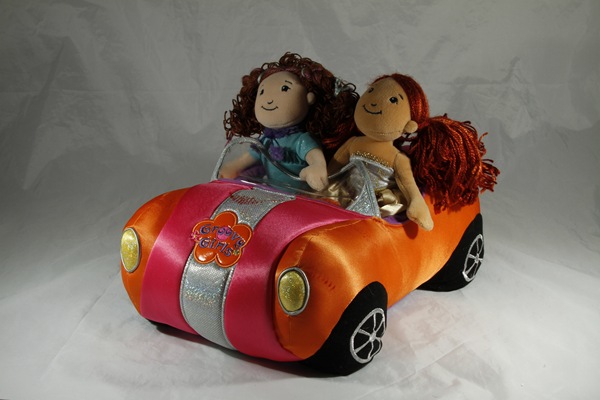
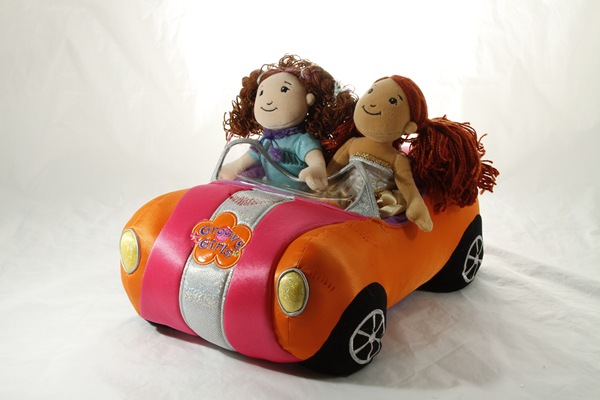
Notice two items below the Firing Group is A:B fire ratio. Here is what the image looks like when that ratio is set to 1:1 with two flashes spaced equal distances from the subject and slightly in front (with included diffusers and flash bounces utilized).
There’s a little more dimension added to the photo.
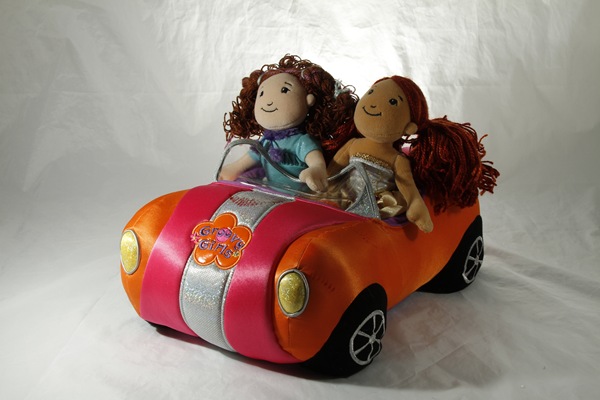
Here’s the same scene with a 4:1 A:B ratio (use the rear control wheel to make your ratio selection)
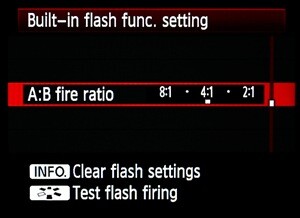
And again, the same scene adjusted to 1:8 A:B ratio
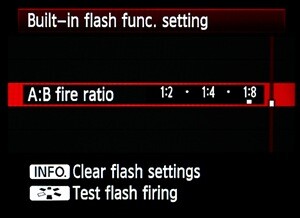
All this is done from the camera with no need to fiddle with the flashes themselves.
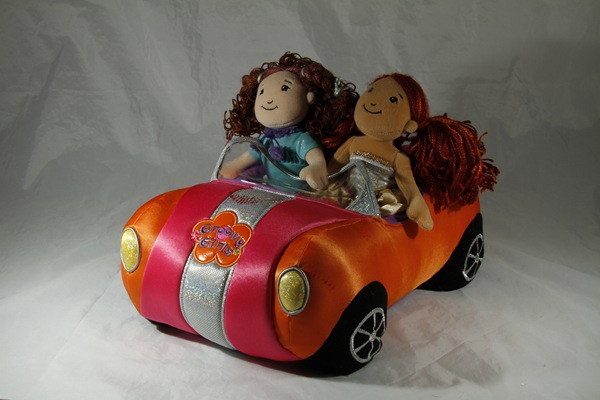
Now let’s include a third flash behind the car to light up the background and reduce some shadows (NOTE: this photo is shot inside a light tent so a rear flash on the curved backdrop will cause some added reflection from the top). Go back to the Firing group option and first, selecting (A+B+C), here’s what we get.
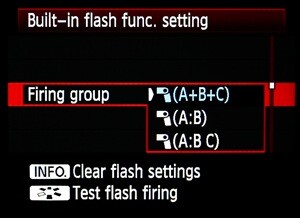
In this mode, the camera will attempt to balance the entire scene while using all the flashes. This leaves scenes with a bit too much light on the backdrop. This can be adjusted by reducing the exposure setting for group C, but a better idea is to not include C in the over all ratio. Switching to (A+B C) mode in the Firing group setting means C will not be included in the calculation for A and B lighting the main subject. It is generally understood in this situation that group C will be used to erase shadow from backdrops, although there can be many creative uses for it.
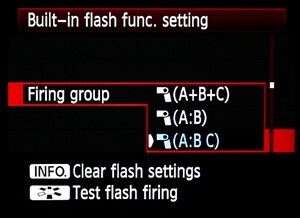
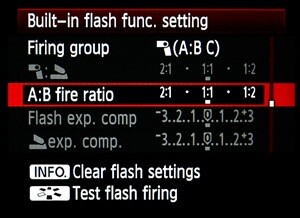
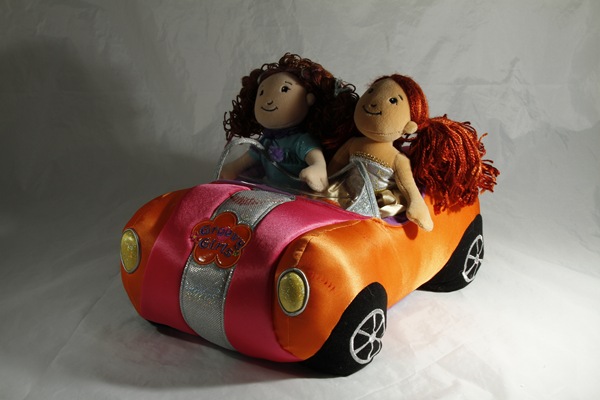
Now let’s adjust the lighting so it’s coming from in front of the car, from flash A.
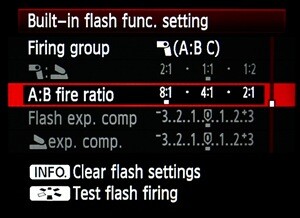
Lastly, let’s bring down the group C light by 2 stops to lessen the glare, This is done by scrolling down to the Grp C exp. comp.
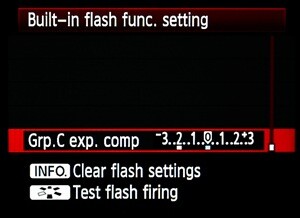
And the tweaking can go on and on and on. By no means a finished photo, the image could still use some adjustment. My goal with this article was to show how easy it is to adjust remote flashes from the Canon 7D camera body. At the same time it must also be said that going back into the menu selection each time to adjust the ratios can be annoying. Canon could do with adding a shortcut directly to the adjustments.
For a first attempt at this wireless flash control feature, I’d say Canon has done a decent job. They have made it useful for a photographer to use the creativity multiple flashes can bring to a shoot. On top of that, multiple flashes may be used within a group. Add in some color gels to the flashes and your own inventiveness starts to become your only limit.
- See more at: http://digital-photography-school.com/how-to-control-multiple-flashes-wirelessly-with-a-canon-7d#sthash.5HUq8H14.dpuf
